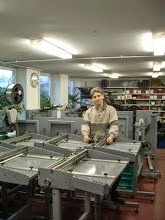
1. Sticking cardboard strips on a foam material to align the sheet to.

Stick some foam material onto the die cutting tool and stick cardboard strips with double sided self adhesive tape on the foam. You can position the sheets which you want to die cut to this cardboard strips. Perhaps this is the easiest solution but the accuracy is sometimes not enough. Unfortunately the foam allows not only up/down movement the positioning cardboard strips can move during the process sideways.
There is a video about this process: https://youtu.be/kb2NERpQv7A


Thie die cutting cylinder can push down the collapsable pins and a spring pushes them back.
There are 8 positioning pins at the corners of the sheets to be die cutted.

The steel rules can be fixed on the die board with screws. The sheets can be positioned to this steel rules.
There is a video about this process: http://www.youtube.com/watch?v=YJWUcrQM9v0

Mount a piece of transparent plastic with a hinge on the die board. Place positioning marks on the plexy. In this tool we pressed the the plexy against the cutting edges so that the trail of the cutting lines should appear on the plexy. We have strengthened this traces with a marker pen. (blue lines in the picture) Place a sheet on the tool, fold the plexy above the tool and align the sheet to the marks on the plexy. Fold the plexy away, place a cutting plate on the sheet and now you can die cut with your cylinder die cutter.

Mount a fold up plate with hinges on the table of the die cutter and fix the tool onto this plate. Stick cardboard strips on the cutting plate to position the sheets. In this way you can place also creasing matrix on the table to improve the quality of creasing.
Unfortunately this solution needs more cutting pressure and you can't cut big, complicated shapes or hard materials in this way.

We can manufacture transparent die cutting tools so you can position it easily to the printed pattern. This solution is optimal if the sheet is big and the die cutting tool is small.
There is a video about a similar process with a flat bed press:
https://youtu.be/RTmhK_Zc5SEhttps://youtu.be/RTmhK_Zc5SE

We have manufactured a devices with you can position the sheets which you want to die cut to a laser “+” mark.
2. Alignment with positioning pins
The problems with the accuracy of the positioning with cartons trips sticked on foam material can be eliminated with using positioning pins as in the following pictures.

Thie die cutting cylinder can push down the collapsable pins and a spring pushes them back.
There are 8 positioning pins at the corners of the sheets to be die cutted.
A very similar solution is to position the sheet with a spring steel rules as in the following picture:

The steel rules can be fixed on the die board with screws. The sheets can be positioned to this steel rules.
There is a video about this process: http://www.youtube.com/watch?v=YJWUcrQM9v0
4. Alignment with a transparent plastic and hinge

Mount a piece of transparent plastic with a hinge on the die board. Place positioning marks on the plexy. In this tool we pressed the the plexy against the cutting edges so that the trail of the cutting lines should appear on the plexy. We have strengthened this traces with a marker pen. (blue lines in the picture) Place a sheet on the tool, fold the plexy above the tool and align the sheet to the marks on the plexy. Fold the plexy away, place a cutting plate on the sheet and now you can die cut with your cylinder die cutter.
5. Fold up table

Mount a fold up plate with hinges on the table of the die cutter and fix the tool onto this plate. Stick cardboard strips on the cutting plate to position the sheets. In this way you can place also creasing matrix on the table to improve the quality of creasing.
Unfortunately this solution needs more cutting pressure and you can't cut big, complicated shapes or hard materials in this way.

We can manufacture transparent die cutting tools so you can position it easily to the printed pattern. This solution is optimal if the sheet is big and the die cutting tool is small.
There is a video about a similar process with a flat bed press:
https://youtu.be/RTmhK_Zc5SEhttps://youtu.be/RTmhK_Zc5SE
7. Positioning with laser

We have manufactured a devices with you can position the sheets which you want to die cut to a laser “+” mark.